
Making decisions can be overwhelming, no doubt. But a decision tree can really help by breaking everything down and showing you all your options and possible outcomes.
Whether you’re planning a project, figuring out a business move, or just making a personal decision, a decision tree helps you organize your thoughts and visualize your options.
While there are specialized tools like Venngage’s Decision Tree Maker for building decision trees, you can also create a basic one right in Google Docs.
If you’re short on time or want a polished look, Venngage’s customizable decision tree templates are a fantastic choice. But don’t worry, I’ll also be walking you through the simple steps to create your own decision tree in Google Docs, so you can choose the one that suits you best.
Click to jump ahead:
- Step-by-step guide to creating a decision tree in Google Doc
- How to make a decision tree in Venngage
- Navigate complex decisions with a functional decision tree
Step-by-step guide to creating a decision tree in Google Doc
To create a decision tree in Google Docs, you can do the following steps:
Step 1: Set up your document
Step 2: Use Google Docs drawing tool
Step 3: Add decision nodes and end nodes
Step 4: Connect nodes with lines
Step 5: Label nodes and branches
Step 6: Customize your decision tree
Step 7: Save and share
Step 1: Set up your document
Let’s start by setting up your workspace in Google Docs to make it easy to draw and align each element as you build the decision tree.
Open Google Docs
- Go to docs.google.com and click the “+” button on the top left corner of the Google Docs interface.
- A blank document keeps your workspace clutter-free and gives you a clean slate to design the decision tree without any distractions.
Adjust page orientation and gridlines
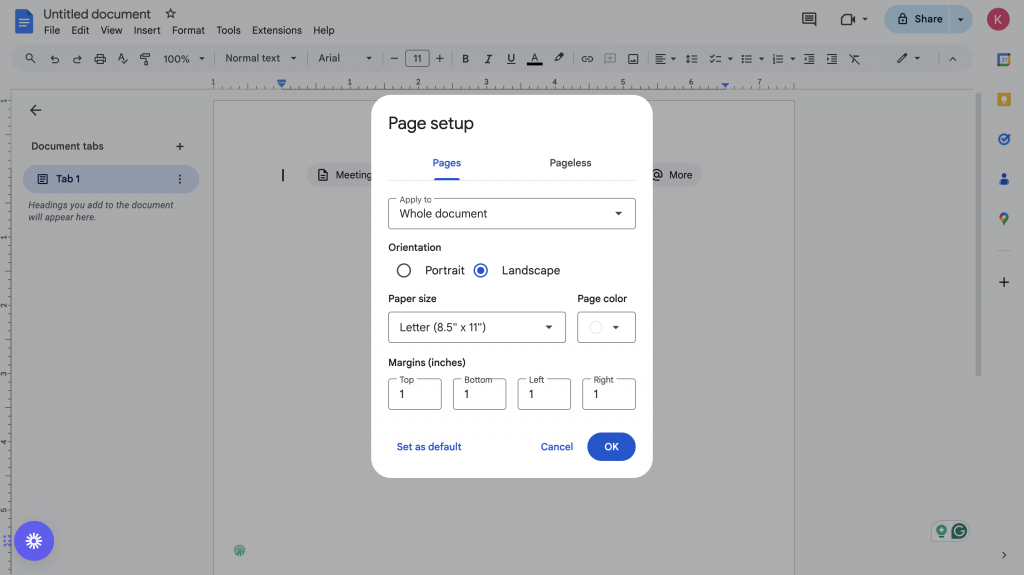
If your decision tree is a bit wide, switching the page to landscape orientation might make things easier to see.
To do this:
- Go to File > Page Setup and select Landscape.
- Then, enable gridlines by using the Drawing tool (explained in the next step) to help with alignment and positioning, making it easier to create a structured layout.
Step 2: Use Google Docs drawing tool
The Drawing tool in Google Docs is where you’ll create each part of your decision tree, from decision points to outcomes.
Access the drawing tool
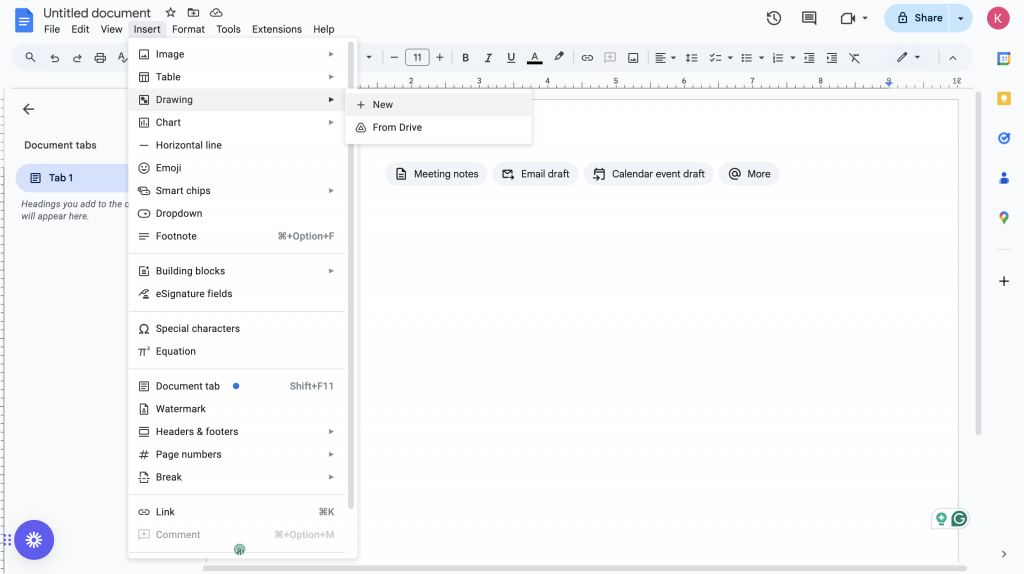
- To open the Drawing tool, go to Insert > Drawing > + New.
- This will bring up a new workspace where you can draw shapes, add lines and set up each part of the tree.
Insert shapes for nodes
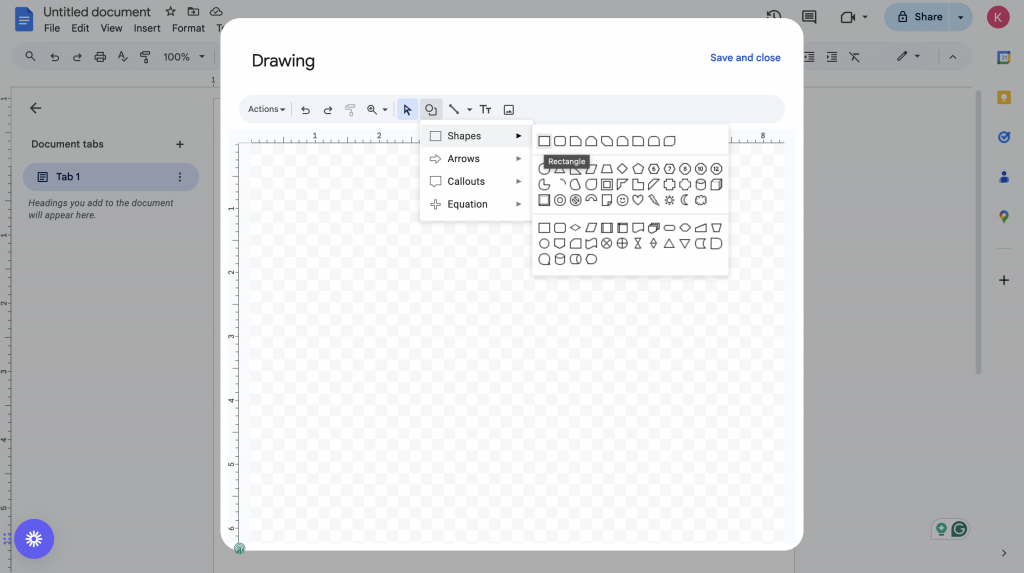
- In the Drawing tool, select Shapes to pick from a range of options.
- Use rectangles for decision nodes and ovals for end nodes. These shapes represent different stages in the decision-making process, making it easier for viewers to follow each path.
Step 3: Add decision nodes and end nodes
Decision and end nodes are key to making a decision tree easy to follow—they show each choice point and possible outcome, so it’s clear how one step leads to the next. To do that:
Add rectangles for decision nodes
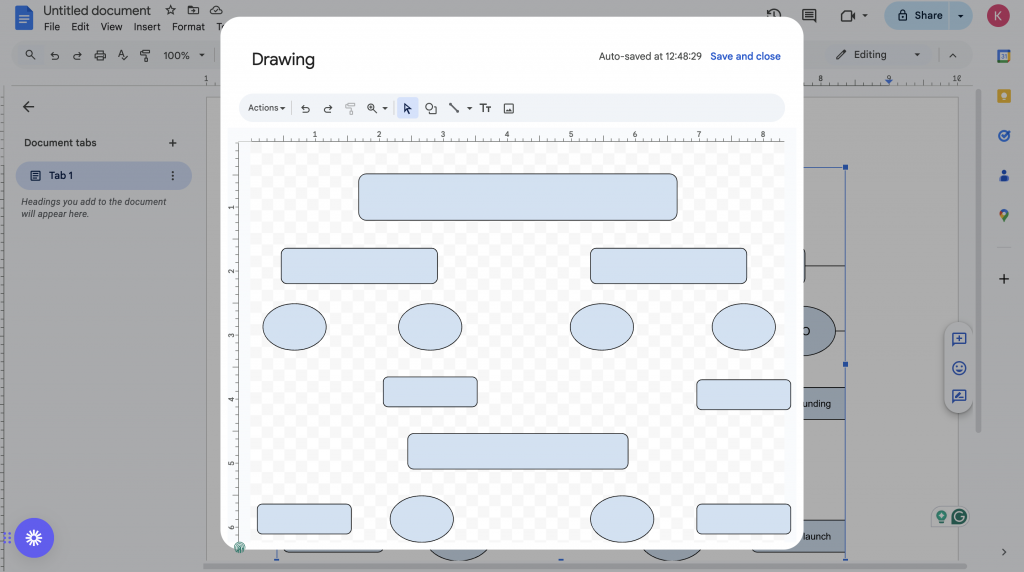
- Click on Shapes > Rectangle to create a rectangle for each decision point.
- Each rectangle represents a choice or decision, so label them to show what each decision is about.
Add ovals for end nodes
- Similarly, select Shapes > Oval to create ovals that represent possible outcomes at the end of each decision path.
- Label each oval with an outcome to show where each path leads, making it easy for viewers to see all possible results.
Step 4: Connect nodes with lines
Now that your nodes are in place, connect them with lines to show the flow of decisions.
Add lines to connect nodes
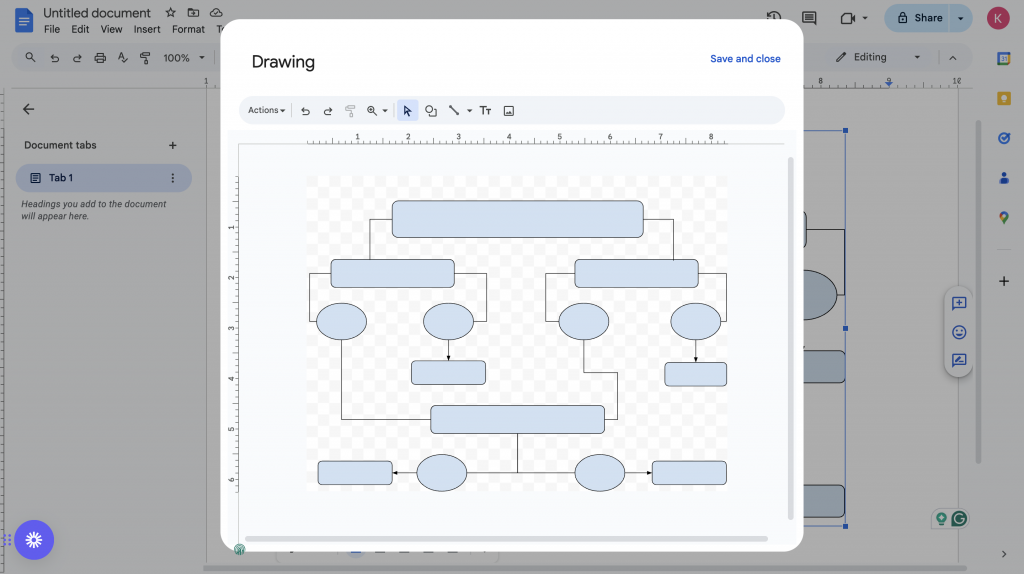
- In the Drawing tool, choose Line or Arrow to draw lines from one shape to the next, creating clear paths for each decision branch.
- These lines help guide anyone looking at the tree through each choice and where it leads.
Adjust lines for visual clarity
- Make sure your lines are straight and aligned to keep everything neat and readable.
- Adjusting the lines and using connectors will help your tree look organized and easy to follow.
Step 5: Label nodes and branches
Clear labels make a decision tree easy to follow. When each node and branch is labeled, it’s simple for anyone to see what each choice means and where each path leads, so there’s no confusion as they move through the steps.
To label the nodes and branches of your decision tree:
Add text to shapes
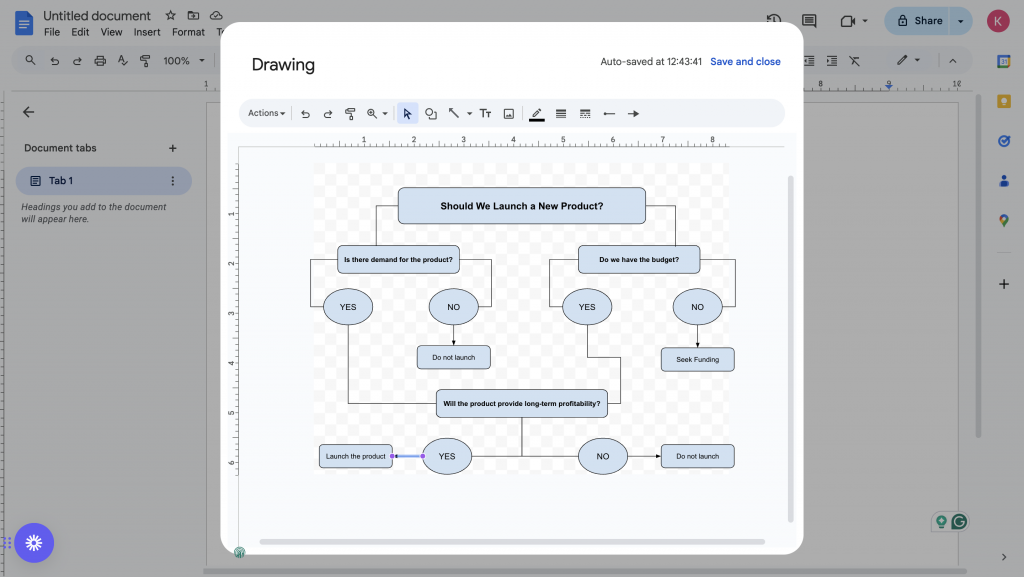
- Double-click on each shape to type in labels, so it’s clear what each decision point or outcome means.
- Labeling right on the nodes helps viewers instantly see the purpose of each step.
Add text to lines
- Place small text boxes near the lines to describe conditions or decisions for each branch.
- This extra bit of info clarifies each path and makes the tree even easier to follow.
Step 6: Customize Your Decision Tree
Almost there — now it’s time to add some finishing touches to make your decision tree look polished and easy to read.
Adjust colors and styles
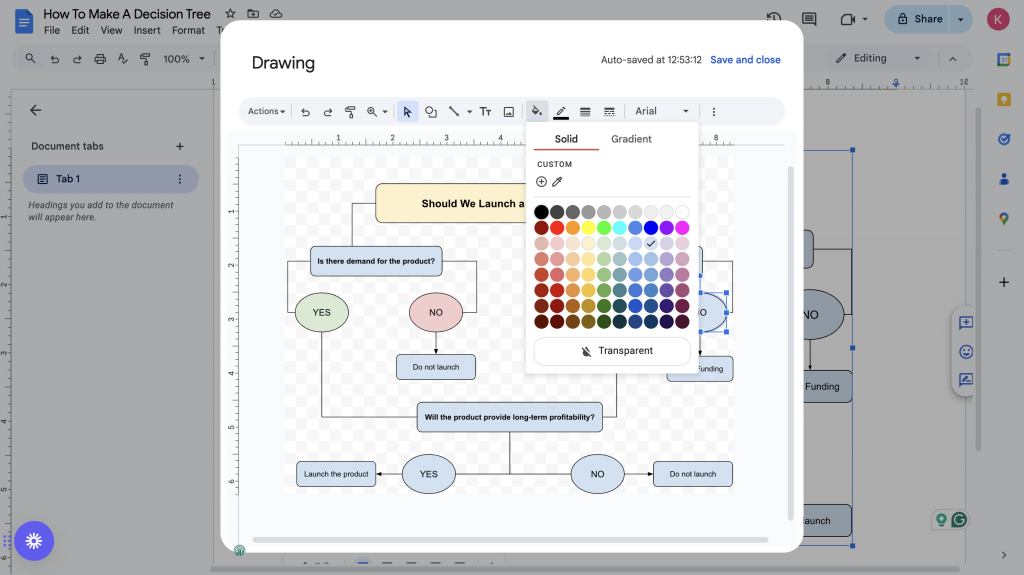
- In the Drawing tool, add color to the different nodes and lines to help them stand out.
- For example, you can use one color for decision points and another for outcomes, or make main branches a bit bolder—this makes it easy to see the flow at a glance.
Align and distribute elements
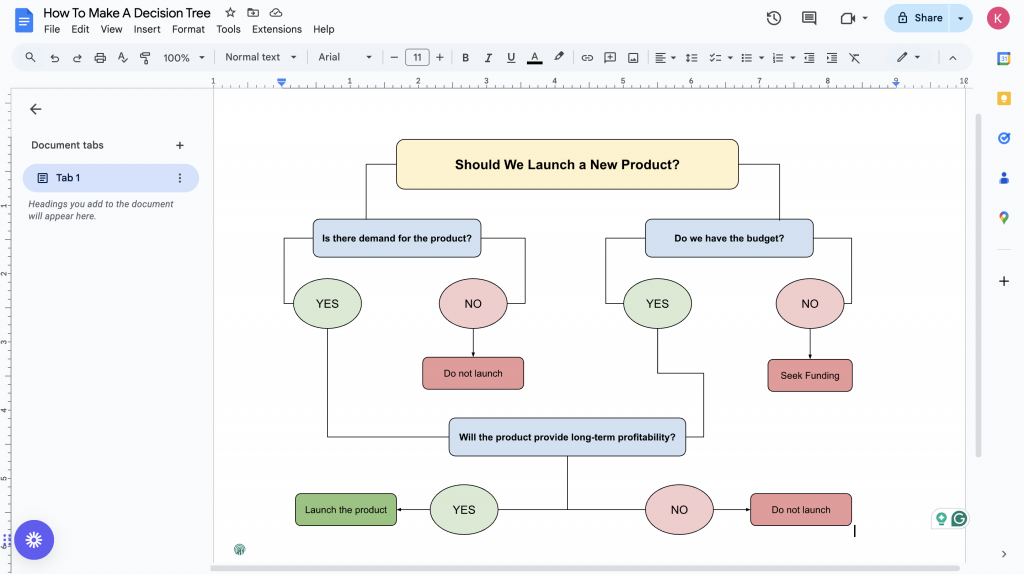
- Use the alignment tools to space out each shape evenly and keep everything lined up.
- This small step gives your decision tree a clean, organized look, making it much easier to follow each path.
Step 7: Save and share
Happy with your decision tree? Great! Now, go ahead and share it online with your team.
Save your Google Docs file
Before that, give your document a clear name and save it to keep your work easily accessible. Google Docs will save automatically, but naming it helps you locate it quickly when you need it.
Share for collaboration
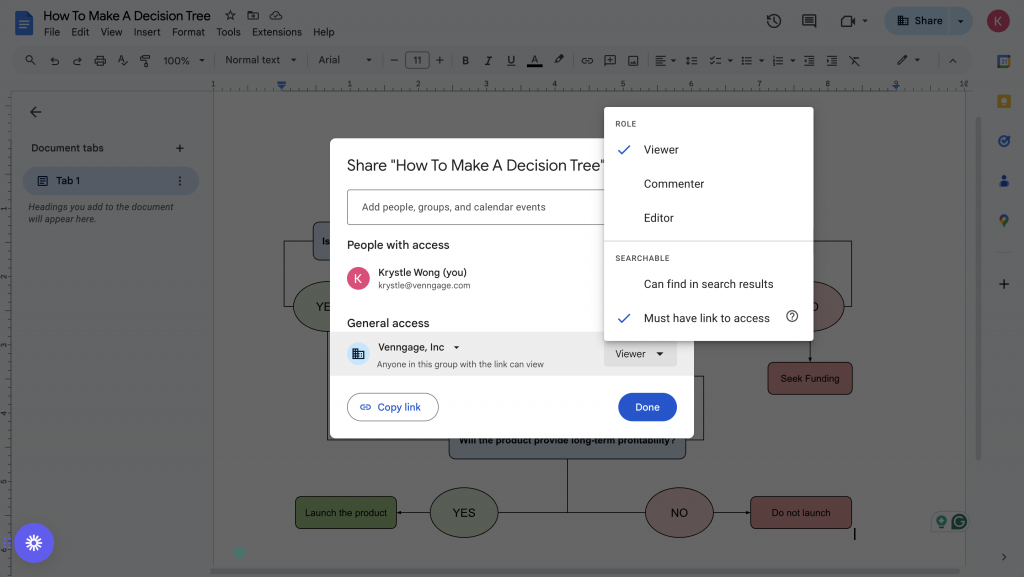
- To share your document in Google Docs, click on the Share button in the top-right corner.
- Enter the email addresses of the people you’d like to share the mind map with, then choose the right permission level for each person:
- Viewer: They can view the mind map but not edit it.
- Commenter: They can view and comment but can’t make changes.
- Editor: They can view, comment, and edit.
- When you’re ready, hit Share, and your mind map will be shared with your selected recipients.
Now that you’ve mastered decision trees in Google Docs, why not expand your toolkit? You might find it helpful to explore other tools like Excel and Microsoft Word. Here are some resources to get you started:
If you’ve never worked with a decision tree before, it might help to also check out how decision tree analysis works or try one of these decision tree makers to get a better grasp of the concept.
How to make a decision tree in Venngage
Creating a decision tree can be a game-changer when you’re tackling a tough decision. While you could make one in Google Docs, let’s face it—Docs isn’t the most efficient or visually appealing tool for the job.
A simpler way to go is using Venngage’s free decision tree maker, where you can quickly customize templates that look polished and make it easy to map out choices.
Here’s how to create a decision tree on Venngage:
- Sign up or login: Go to venngage.one, and sign up for a free account if you don’t have one, or log in to access your dashboard.
- Choose a template: Browse Venngage’s selection of decision tree templates and pick one that fits your needs.
- Edit the decision tree: Use the drag-and-drop editor to add decision points and outcomes, and customize colors and fonts to match your style.
- Personalize your decision tree: Add icons and illustrations from Venngage’s library of 40,000+ options to make your tree visually engaging.
- Download or share: When you’re ready, download your decision tree or share it with your team via a private link.
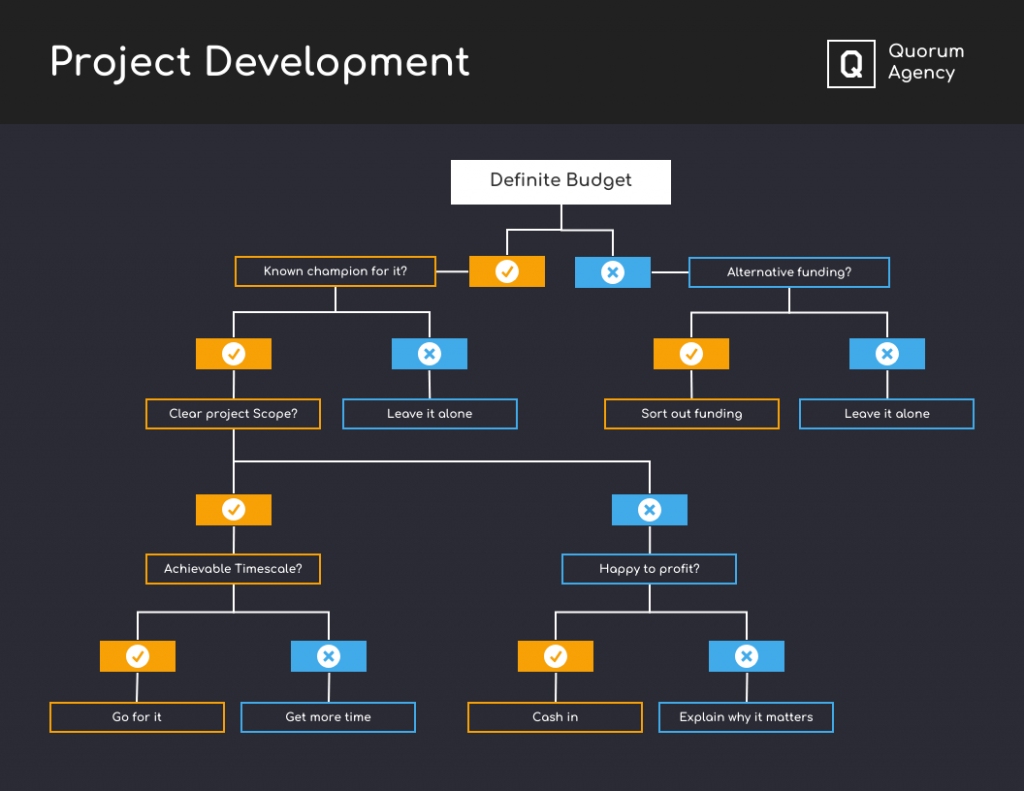
For project managers and team leaders, a decision tree is a great way to lay out key decisions and outcomes, helping guide the team through both planning and execution.
With this template, you can clearly visualize each choice and its consequences, making decision-making easier and keeping everyone on the same page throughout the project.
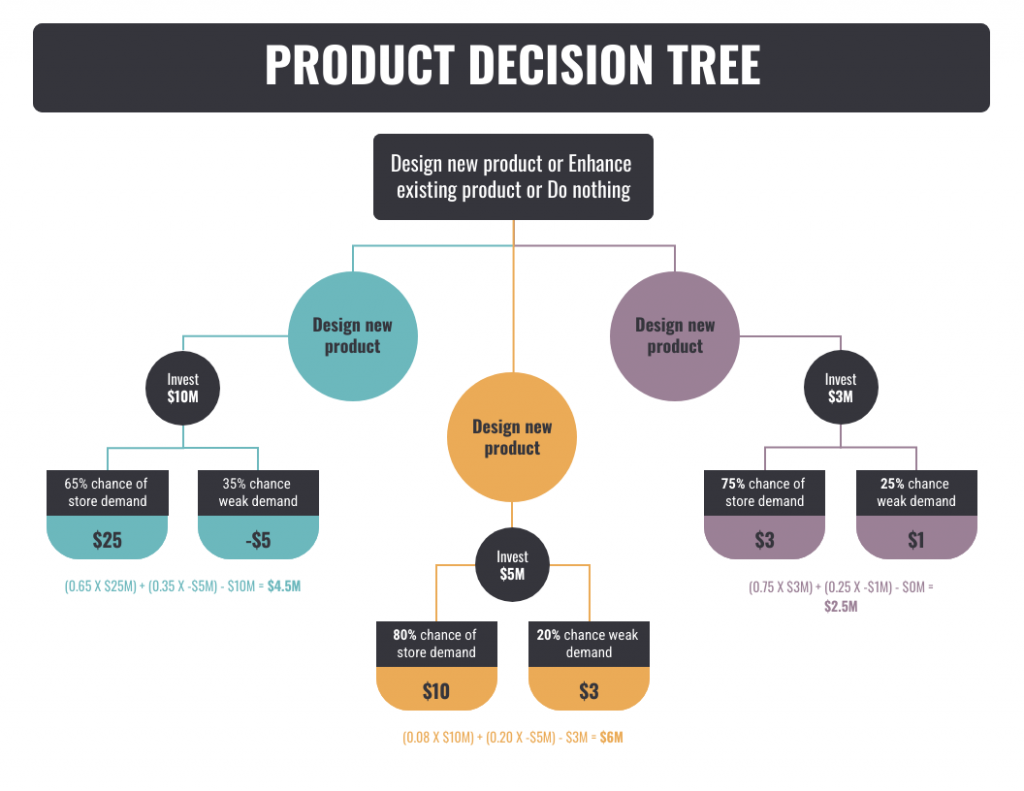
A product decision tree on the other hand makes it easier for your team to make thoughtful choices by laying out key product decisions and their possible outcomes. It’s especially useful for product managers, designers, and marketing teams because it provides a clear path for each decision.
By visualizing options and potential results like in the template below, it helps ensure decisions are made strategically.
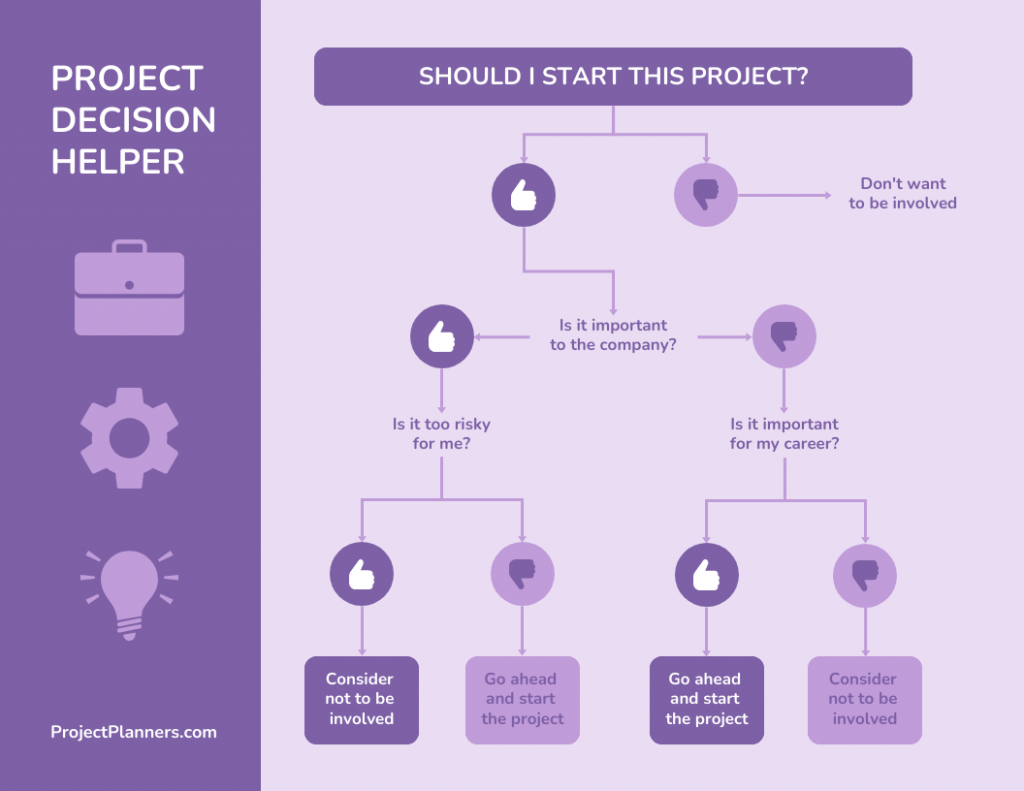
Decision trees are great for personal decision-making because they break down complex choices into simpler, manageable steps.
Whether you’re figuring out a career path, planning a big life change, or deciding on a major purchase, a decision tree lets you map out each option and see the possible outcomes. Here’s how to get started:
Not the template you’re looking for? Here are 15+ decision tree infographics that can help you visualize problems and make better decisions.
Navigate complex decisions with a functional decision tree
Google Docs is great for putting together a quick decision tree, but if you’re anything like me, you might find yourself wishing for more design options and flexibility.
If you’re looking to create a decision tree that’s both clear and visually engaging, Venngage’s Decision Tree Maker might just be the one for you. With tons of templates and easy-to-use design tools, you can easily make a decision tree that’s both functional and visually compelling, perfect for sharing with your team or just keeping your own projects on track.


